Setting webpack for three.js app
Basic webpack configuration for your three.js app

Step 1: Init app
Create directory for the application and start init a node app with:
npm init
Create index.html and src folder in the project directory. The src folder will contain all of the scripts (and assets) and the index.html is just simple like this:
<!DOCTYPE html>
<html lang="en">
<head>
    <meta charset="UTF-8">
</head>
<body>
  // ...
</body>
</html>
And the package.json something looks like this:
{
  "name": "webpack-three",
  "version": "1.0.0",
  "description": "Basic webpack configuration for your three.js app",
  "main": "index.js",
  "scripts": {
    "test": "echo \"Error: no test specified\" && exit 1"
  },
  "author": "",
  "license": "ISC"
}
Step 2: Webpack setup
Open terminal in the project directory, run the following command to install the webpack dependencies:
npm i webpack webpack-cli
In the src folder, create index.js and App.js files. The index.js will be the entry for webpack configuration and App.js is the main script.
in App.js add:
class App {
  constructor() {}

  init = () => {
    // main script goes here...
  }
}

export { App }
and in index.js add:
import {App} from './App';

const app = new App()
app.init()
Step 3: Webpack configuration
In the root of the app, create webpack.config.js file and add the following basic setup:
const path = require('path');

module.exports = {
    name: "webpack-three",
    entry: {
      app: ["./src/index.js"],
    },
    output: {
      path: path.join(__dirname, "dist"),
      filename: "bundle.js",
    },
}
For testing, in package.json update the following scripts:
"scripts": {
    "test": "webpack --config webpack.config.js",
},
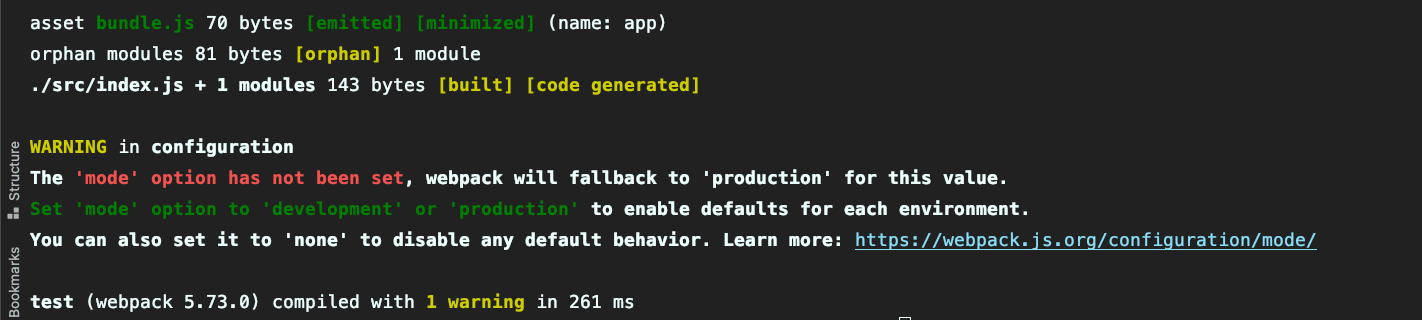
and you can run npm run test anytime to check the output in the dist folder. The dist folder contains the bundle.js as we configured in the webpack.config.js.
From this step, when you npm run test command, the terminal will show a warning about your mode option setting, it's okay we're gonna setup it in the configuration file.
Open your webpack.config.js, add the following option (probably on top) in your module.exports:
module.exports = {
  mode: "development",
  //....
}
Run npm run test again and everything is fine.
If you don't want to run test, you can change the script option in your package.json to something like build or dev for your production deployment.
"scripts": {
    "build": "webpack --config webpack.config.js",
},
Step 4: Creating Dev configuration to start a live server
In this step, you need to setup a devServer for starting a static server for all of your assets with built-in live reload. That means all of your files and assets will get destroyed and re-built again as soon as the server starts.
Adding dev script in package.json:
"scripts": {
    "build": "webpack --config webpack.config.js",
    "dev": "webpack serve --config webpack.config.js",
},
You can create and use another config file for your dev-server configure, and you may need webpack-merge module if you need to combine and import all of your configure files.
Here we're gonna use one single file to simplify the process.
Open the terminal and run:
npm i webpack-dev-server
to install dev-server module.
Adding devServer key to module exports:
devServer: {
  static: {
    directory: path.join(__dirname, 'dist'),
  },
  host: "0.0.0.0", // Open every network Access.
  compress: true,
  port: 9000,
},
Now, try running npm run dev and you should see a live server being launched at port 9000.
However, you won't see anything displayed in your web page yet. It's because in your dist folder, there is nothing except your bundle.js file.
Basically, you can copy and paste the index.html into your dist folder and re-run the app. It will work fine, but this is not the way we do it. We're gonna use another plugin to do this for us.
Step 5: Add plugins into webpack.config
How to add plugins into webpack.config:
- Plugins are required to add at the top of config file, after the
entrypoint. - All plugins will be added in the array of
pluginskey inmodel.exports.
For example,
module.exports = {
    mode: "development",
    name: "webpack-three",
    entry: {...},
    output: {...},
    plugins: [],
    devServer: {...},
};
Now, open terminal and run to install:
npm i copy-webpack-plugin html-webpack-plugin
We need 2 plugins here - copy-webpack-plugin and html-webpack-plugin.
The thing is you will have an asset folder where you will store all your images, textures, etc, and with copy-webpack-plugin when you build the app, these files will be copied into the dist folder.
The html-webpack-plugin works the same way but for .html file.
Before doing next step, make sure you created an asset folder and put some test images into it.
Go to the webpack.config.js file, add those plugins on the top of the file:
const CopyPlugin = require("copy-webpack-plugin");
const HtmlWebpackPlugin = require("html-webpack-plugin")
Add plugins key to module exports:
plugins: [
  new HtmlWebpackPlugin({
    filename: path.resolve(__dirname, "dist", "index.html"),
    hash: true,
  }),
  new CopyPlugin({
    patterns: [
      { from: "src/assets/", to: "assets/" },
    ],
    options: {
      concurrency: 100,
    },
  }),
],
Try running npm run dev again and you should see your assets folder and index.html are included in the dist folder.
WARNING:
From this step, if you got error while running the npm run dev command, you may need to upgrade your node version to the latest one by following command:
npm install node@latest -g
and reduce the version of copy-webpack-plugin by running:
npm install copy-webpack-plugin@9 -D
Try running npm run build and npm run dev again to launch the app.
From now you are ready to create three.js Scene and some objects for your three.js app. Everything you change in the script will be automatically re-built and loaded in the web page.
Step 6: Create basic threejs Scene:
Open terminal and install three
npm i three
In App.js, setup and create basic Scene with a green Cube:
import * as THREE from 'three'

init = () => {
    const container = document.createElement("div");
    document.body.appendChild(container);

    // camera
    this.camera = new THREE.PerspectiveCamera(
      75,
      window.innerWidth / window.innerHeight,
      0.1,
      1000
    );
    this.camera.position.set(0, 0, 5);

    // renderer
    this.renderer = new THREE.WebGLRenderer({
      antialias: true,
    });
    this.renderer.setClearColor(0xaaaaaa, 0); // Alpha color setting.
    this.renderer.setPixelRatio(window.devicePixelRatio);
    this.renderer.setSize(window.innerWidth, window.innerHeight);
    this.renderer.physicallyCorrectLights = true;
    this.renderer.outputEncoding = THREE.sRGBEncoding;
    container.appendChild(this.renderer.domElement);

    // scene
    this.scene = new THREE.Scene();
    this.scene.background = new THREE.Color(0x000000)

    const geometry = new THREE.BoxGeometry( 1, 1, 1 );
    const material = new THREE.MeshBasicMaterial( { color: 0x00ff00 } );
    const cube = new THREE.Mesh( geometry, material );
    cube.rotation.y = Math.PI/180 * 30
    cube.add(new THREE.AxesHelper(2))
    this.scene.add( cube );

    this.#render()

    //
    window.addEventListener("resize", this.#onWindowResize);
  };
You don't need to re-run the app, all your assets and scripts are automatically re-built and loaded in the web page. Now, a green box should be rendered in the Scene as expected.
That's it! Thanks for reading and happy coding!
